DIY Kitchen Remodel: Your Ultimate Guide to a Budget-Friendly Makeover
Kitchen Remodeling

Why Remodel Your Kitchen?
Remodeling your kitchen is one of the best investments you can make in your home. It not only improves functionality and aesthetic appeal but also significantly boosts your home's resale value: A modern, well-designed kitchen is a major selling point for potential buyers. Plus, the satisfaction of cooking in a space that reflects your style and meets your needs is unbeatable.
DIY vs. Contractor Kitchen Remodels
Should you take on a DIY kitchen remodel or leave it to the experts (aka kitchen remodel contractors)? Let’s compare the two options with a closer look at time, effort, and monetary cost.
Time and Effort: DIY Kitchen Remodel
- Time and effort: Moderate to high. Expect to spend several weekends or even months on your project, depending on the scope.
- Skills needed: Basic carpentry, plumbing, and electrical knowledge will be very helpful.
- Permit acquisition: You’ll need to research and obtain any necessary permits yourself, which can be time-consuming but not overly difficult.
Time and Effort: Contractor Kitchen Remodel
- Time and effort: Low for you but potentially disruptive because contractors will be in and out of your home.
- Skills needed: None, but you need to be able to manage and communicate effectively with your contractor.
- Permit acquisition: Contractors will handle permits, ensuring all work complies with local codes and regulations.
DIY Kitchen Remodel Cost
- Average cost: $10K-$15K for a mid-range remodel, depending on materials and scope
- Savings: Labor costs, which can account for 20 percent of the total remodel cost
Cost to Hire Kitchen Remodel Contractors
- Average cost: $20K-$50K, including materials and labor
- Peace of mind: Professional workmanship and often faster completion
Now that we’ve explored the reasons for remodeling your kitchen and weighed the pros and cons of DIY versus hiring a contractor, it’s time to dive into the nitty-gritty. Tackling a kitchen remodel on your own may seem daunting, but with a solid plan and the right steps, you can transform your space efficiently and affordably. Let’s walk through a step-by-step guide to help you achieve a stunning kitchen makeover without breaking the bank.
Step-By-Step Guide to a DIY Kitchen Remodel
1. Set a Budget.
- DIY difficulty level: Easy
- Estimated DIY cost: $0 (just your time)
- Estimated contractor cost: N/A
- Estimated time: 1-2 hours
Setting a budget is the crucial first step in your DIY kitchen remodel. Determine how much you can afford to spend and try to stick to it. Factor in costs for materials, tools, and any professional help you might need. You can get quotes from multiple companies to get an idea of what your project will cost. It’s also helpful to research hardware stores online and look up the materials you will need. Then include a contingency fund of about 10 to 20 percent of your total budget for unexpected expenses.
A well-planned budget can make the difference between a smooth project and a financial nightmare. Be realistic about what you can afford, and prioritize your spending on elements that will have the most impact, such as cabinets, countertops, and flooring.
2. Gather Inspiration.
- DIY difficulty level: Easy
- Estimated DIY cost: $0 (just your time)
- Estimated contractor cost: N/A
- Estimated time: Ongoing
Here’s the fun part: Spend time browsing Pinterest, Instagram, and home improvement blogs to collect ideas. Look for inspiration in other places, as well, including showrooms and magazines, and take note of what appeals to you and why. Then create a vision board to compile your favorite designs, colors, and layouts. This visual aid will help you stay focused and make cohesive design choices throughout your remodel.
It helps to choose a focal point for your kitchen, as well, such as your cabinets, countertops, or a striking backsplash. Once you have a key element, it’s easier to select complementary pieces. For example, if you fall in love with a particular countertop material, use that as the foundation for your color scheme and other design choices.
Current Kitchen Remodeling Trends
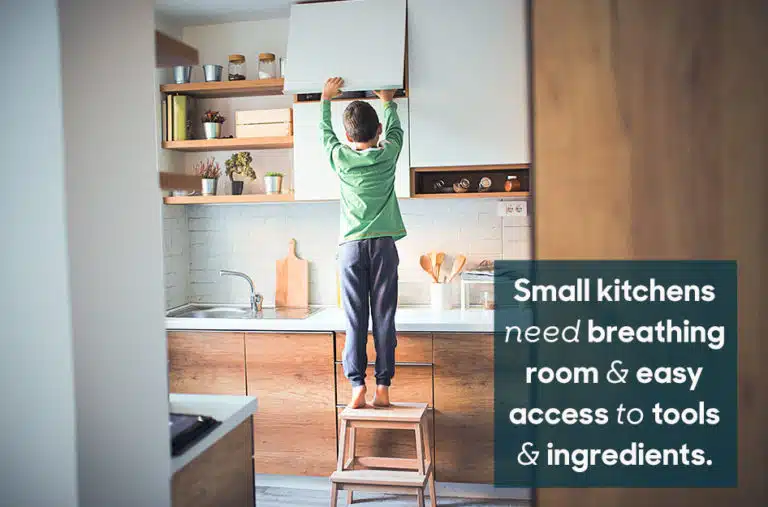
Want to know what’s popular now? Try open shelving. It offers a light, airy look while showcasing your favorite dishes and glassware. Check out these open shelving ideas for some beautiful examples.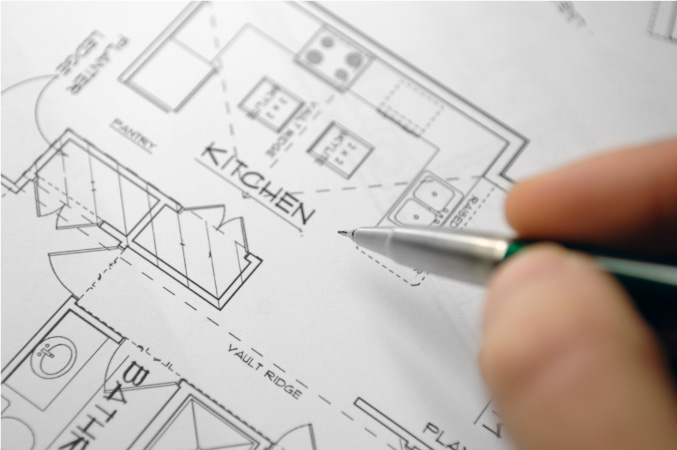
Once you have your measurements, sketch your layout on graph paper or use digital tools like SketchUp or RoomSketcher.
3. Plan Your Layout.
- DIY difficulty level: Moderate
- Estimated DIY cost: $0-$100 (software tools, if needed)
- Estimated contractor cost: $100-$800 (professional designer)
- Estimated time: 5-10 hours
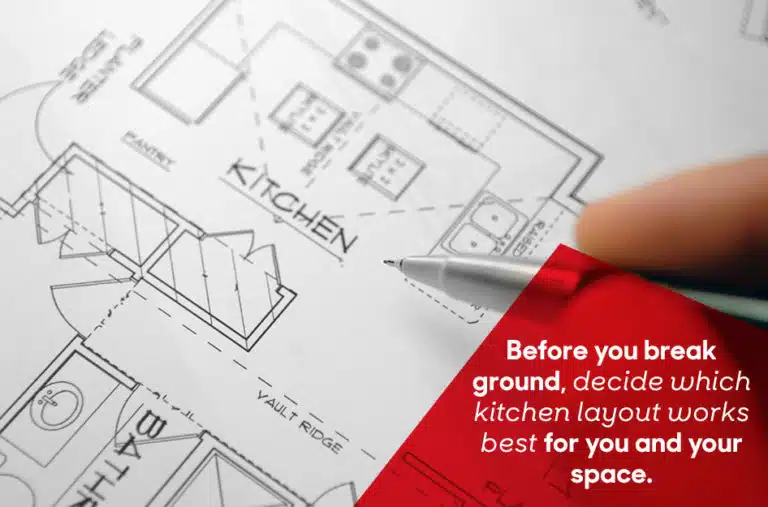
Planning your kitchen layout is a crucial step. Begin by measuring your current space. Measure the dimensions of the room, including the height, length, and width. And don’t forget to measure windows, doors, and any fixed features like plumbing and electrical outlets. These measurements will form the basis of your new kitchen layout.
Once you have your measurements, sketch your layout on graph paper or use digital tools like SketchUp or RoomSketcher. These tools can help you visualize your space and experiment with different configurations.
While you’re planning the layout, consider the work triangle principle, which ensures that the sink, stove, and refrigerator are positioned to allow for efficient movement while cooking. And before purchasing any new pieces, know the sizes you can accommodate. This includes cabinets, appliances, and islands. And don’t just stop at “Will this fit?”
Consider how functional the area will be after installation. For example, if you’re planning to include an island, ensure you have at least 42 inches of space around it for comfortable movement.
4. Set Up a Makeshift Kitchen.
- DIY difficulty Level: Easy
- Estimated DIY cost: $0-$500 (temporary supplies)
- Estimated contractor cost: N/A
- Estimated time: 1-2 hours
Setting up a makeshift kitchen will help you maintain some normalcy while your actual kitchen is under construction. It allows you to continue preparing meals without the need to eat out constantly, saving money and hassle.
Step-By-Step Guide To Setting Up a Makeshift Kitchen
- Choose a location: Select a space in your home that can comfortably accommodate your temporary kitchen setup. This could be a dining room, a garage, or even a basement. Ensure the area has access to electrical outlets and, if possible, a water supply.
- Gather essential appliances: Collect small, portable appliances that can help you with basic cooking tasks. A microwave, toaster oven, electric skillet, hot plate, and mini-fridge are ideal. These will allow you to prepare simple meals without relying on takeout.
- Organize your space: Arrange your appliances on a sturdy table or countertop. Use portable shelving units or storage bins to keep utensils, pots, pans, and ingredients organized and easily accessible.
- Create a cleanup station: If you don't have access to a sink in your temporary kitchen, set up a wash station with a large basin or plastic tub. You can fill it with water for washing dishes and utensils. Keep dish soap, sponges, and towels nearby.
| Money-Saving Tip: Borrow small appliances from friends or family instead of buying new ones to see how they fit in your space. You can also check second-hand stores or online marketplaces for affordable options. |
5. Get Down and Dirty With Demolition.
- DIY difficulty level: Hard
- Estimated DIY Cost: $300-$800
- Estimated contractor cost: $500-$3,000 (labor)
- Estimated time: 1-3 days
Demolition is where the real work begins. Safety is paramount, so wear protective gear and ensure utilities are turned off before you start. Then, begin to safely dismantle items that will be replaced, such as cabinets, countertops, and appliances — being careful not to damage areas you plan to keep.
You’ll need an extensive list of supplies to help with your demo. Check out the DIY Playbook’s list here to get an idea. And don’t be afraid to call in the troops, as this is likely not a one-man job. Enlist friends and family — especially the gym rats, you’ll need that muscle! — grab a hammer, and get to work.
How To Control Demolition
- Create a plan: Before you start swinging the sledgehammer, create a detailed demolition plan. Identify what needs to be removed and what will stay. This plan will help you stay organized and avoid unnecessary damage.
- Prepare the area: Clear out everything from your kitchen, including furniture, appliances, and personal items. Cover floors and any areas that need protection with drop cloths or plastic sheeting. And seal off other rooms with plastic sheeting to contain the dust and debris.
- Label and save: If you plan to reuse any cabinets, hardware, or fixtures, label them and set them aside. This can save you money and keep your remodel eco-friendly.
Important Safety Information
- Wear protective gear: Always wear safety glasses, gloves, a dust mask, and sturdy footwear. Demolition can produce flying debris and dust, so protection is crucial.
- Turn off utilities: Ensure that all utilities (electricity, gas, and water) are turned off before you begin. This prevents accidents and allows you to safely remove appliances and fixtures.
- Watch for hazards: Be mindful of hidden hazards like asbestos, lead paint, and mold. If you suspect any of these, consider hiring a professional to test and handle the removal safely.
- Use the right tools: Use appropriate tools for the job, such as crowbars, hammers, and reciprocating saws. Using the wrong tool can make the job harder and more dangerous.
Proper demolition sets the stage for a smooth remodel. It’s a physically demanding task but very satisfying as you see your old kitchen transform.
| Pro Tip: Want to know what to do with all the old stuff? Consider renting a dumpster or hiring a junk removal service to handle the debris. |

Installing a new kitchen faucet is one of the smaller plumbing tasks you might feel comfortable handling yourself.
6. Assess the Electrical and Plumbing Work Involved.
- DIY difficulty level: Very Hard
- Estimated DIY cost: $500-$1,500
- Estimated contractor cost: $3,500-$6,000
- Estimated time: 1-2 weeks
Electrical and plumbing work are among the most technical aspects of a kitchen remodel and should be approached with extreme caution. Because these tasks are critical to the functionality and safety of your kitchen, it’s best to leave that work to professionals. Mistakes in these areas can result in thousands of dollars in damages, not to mention potential safety hazards.
Why Hire Professionals
- Safety: Electrical and plumbing work involves dealing with high-voltage electricity and pressurized water systems. Improper handling can lead to severe injuries or even fires and floods.
- Code compliance: Professionals ensure that all work is up to code and passes inspections. This is crucial for the safety of your home and can affect your home’s insurance and resale value.
- Expertise: Professionals have the knowledge and tools to handle complex tasks efficiently. They can troubleshoot and solve issues that might be beyond a DIYer's skill set.
Example Electrical Work Involved in a Kitchen Remodel
- Rewiring and installing new outlets: Adding more outlets or moving them to new locations
- Installing lighting: Overhead lighting, under-cabinet lighting, and task lighting
- Upgrading circuit panels: Ensuring your electrical system can handle new appliances and fixtures
Example Plumbing Work Involved in a Kitchen Remodel
- Moving plumbing lines: Adjusting the placement of sinks, dishwashers, and refrigerators
- Installing new fixtures: Adding or upgrading sinks, faucets, and garbage disposals
- Ensuring proper drainage: Installing new pipes and ensuring proper water flow and drainage
Cost Considerations
- Electrical work: The cost typically ranges from $500 to $1,500, depending on the complexity of the job. This includes labor and materials.
- Plumbing work: Costs typically range from $2,000 to $5,000, factoring in the extent of the work and the materials needed.
DIY Options
While major electrical and plumbing tasks should be left to the pros, there are smaller tasks you might feel comfortable handling yourself, such as:- Installing light fixtures: Swapping out old fixtures for new ones
- Replacing faucet fixtures: Installing a new kitchen faucet
- Adding under-cabinet lighting: Using plug-in or battery-operated options
Always ensure you turn off the main power and water supplies before attempting any DIY electrical and plumbing work. And if you encounter any issues, do not hesitate to call a professional.
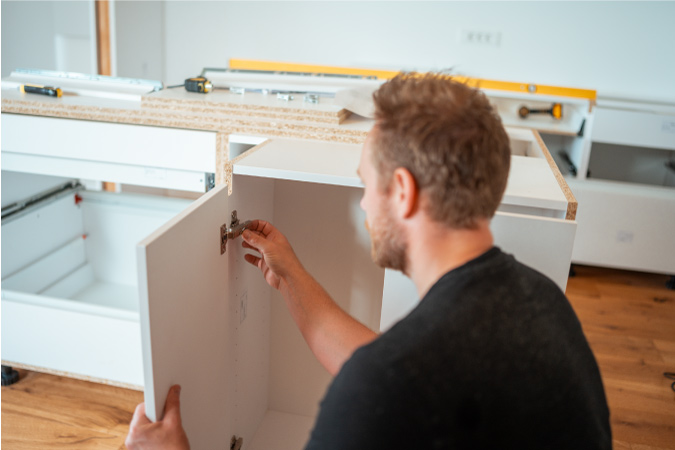
Installing cabinets and countertops involves several technical steps that can be tricky for DIYers.
7. Install Cabinets and Countertops.
- DIY difficulty level: Moderate
- Estimated DIY cost: $2,000-$5,000
- Estimated contractor cost: $6,000-$8,000
- Estimated time: 1-2 weeks
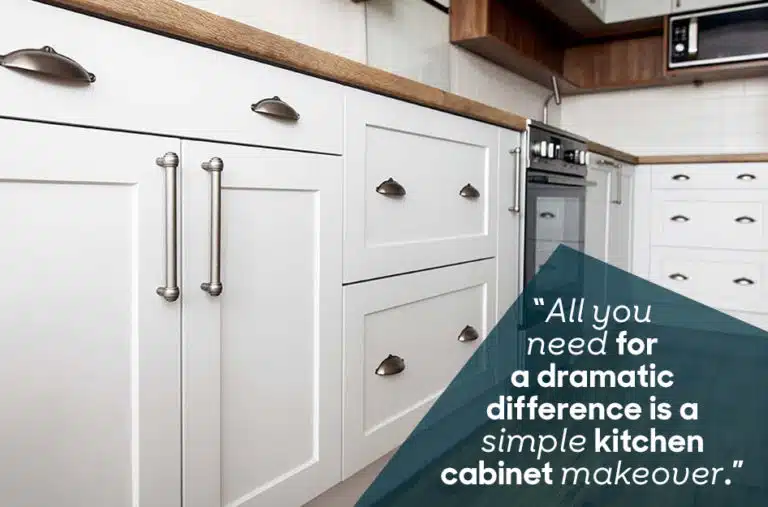
Installing cabinets and countertops is one of the most rewarding stages of a kitchen remodel. This is where your vision starts to take shape, giving your kitchen its new look and feel. However, it’s also one of the more challenging aspects of the project, requiring precision, patience, and the right tools.
Why It’s Challenging
Installing cabinets and countertops involves several technical steps that can be tricky for DIYers. The challenge starts with ensuring that the cabinets are level and securely anchored to the walls, which can be difficult in homes with uneven walls and floors. Misalignment can lead to gaps, crooked countertops, and functional issues like drawers that don’t close properly. Likewise, lifting and positioning upper cabinets requires careful coordination, especially if you're working alone or with limited help.
And countertop installation brings its own set of difficulties. Whether you’re working with heavy materials like granite or quartz or more forgiving options like laminate, precise cutting and fitting are crucial. Mistakes in measurement or cutting can be costly and difficult to correct. For these reasons, many homeowners choose to hire professionals for this stage of the remodel.
Tips and Tricks for a Smoother DIY Installation
- Use a laser level: One of the most effective ways to ensure your cabinets are level is by using a laser level. This tool projects a straight line across your walls, helping you mark accurate cabinet heights and alignment points.
- Start with the upper cabinets: Begin with the upper cabinets before installing the base units. This approach gives you more room to work and prevents damage to the lower cabinets while installing the uppers.
- Take advantage of shims: Shims are essential for filling gaps between the cabinets and uneven walls or floors, ensuring a stable and even installation. Here’s a guide on using shims during installation.
- Pre-drill holes for fastening: Pre-drilling holes in your cabinets and walls will make it easier to insert screws without damaging the material. This step is especially important for delicate materials like plywood or particle board, which can crack if drilled improperly.
- Measure twice, cut once: When it comes to countertops, accurate measurement is critical. Double-check your measurements before making any cuts, particularly around sink openings or appliance spaces. Using templates or guides for cutting can help prevent mistakes. Check out this guide on countertop installation.
- Enlist help: Cabinet and countertop installation is often a two-person job (at least). Don’t hesitate to ask for help when lifting heavy materials or ensuring precise alignment. Having an extra set of hands can make the process safer and more efficient.
- Secure cabinets properly: Use cabinet screws designed for heavy-duty use, and ensure they are long enough to penetrate the studs behind your walls. This will help prevent your cabinets from coming loose over time.
When To Consider Hiring a Professional
If you’re unsure about your ability to handle cabinet and countertop installation, or if you’re dealing with expensive materials where mistakes could be costly, it might be worth hiring a professional. Pros have the experience and tools to install these elements quickly and accurately, ensuring a polished finish. This is especially true if you’re installing stone countertops of any kind, as the material can require special equipment to be lifted on top of the cabinets.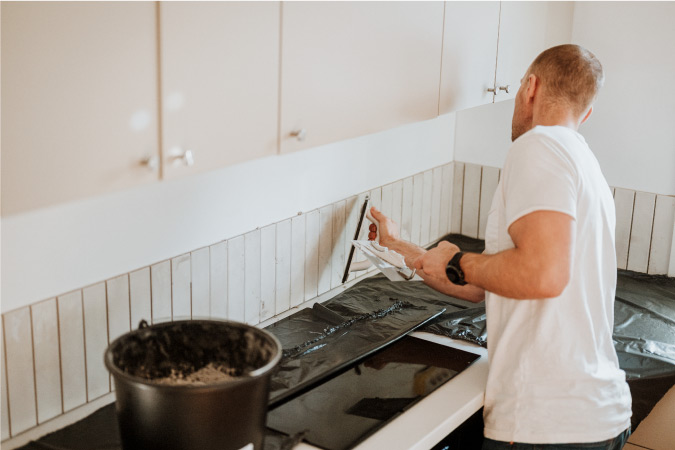
Working on vertical surfaces can be more physically demanding and requires extra care to ensure tiles don’t slip out of place before they set.
8. Replace the Flooring and Backsplash.
- DIY difficulty level: Moderate
- Estimated DIY cost: $1,000-$3,000
- Estimated contractor cost: $3,000-$8,000
- Estimated time: 1-2 weeks
Installing flooring and a backsplash can significantly enhance the overall look and feel of your kitchen, adding both beauty and functionality. However, these tasks can be challenging, requiring careful planning, precision, and the right tools to achieve a professional finish.
Both flooring and backsplash installation involve working with materials that need to be cut and placed precisely. Flooring installation can be difficult because you’re dealing with large surface areas and materials such as tile, laminate, and vinyl that must fit together seamlessly. Uneven subfloors, improper spacing, and incorrect cuts can result in a floor that looks unprofessional and doesn’t last as long as it should. Additionally, some flooring materials, such as tile, require mortar or adhesive, which can be tricky to work with — especially if you’re new to DIY projects.
Backsplash installation poses its own challenges, particularly when it comes to cutting tiles to fit around outlets, corners, and edges. Uneven application of adhesive or grout can lead to crooked tiles and an unsightly finish. Working on vertical surfaces can also be more physically demanding and requires extra care to ensure tiles don’t slip out of place while the adhesive is setting.
Tips and Tricks for a Smoother Installation
- Prepare the subfloor: Before installing flooring, ensure that your subfloor is clean, dry, and level. Uneven surfaces can cause tiles to crack or floors to squeak. If necessary, use a leveling compound to smooth out any dips or bumps.
- Dry fit your tiles: For both flooring and a backsplash, it’s important to dry fit your tiles before applying any adhesive. This involves laying out your tiles in the pattern you plan to install them to ensure they fit properly and to determine where cuts are needed. This step helps prevent mistakes and allows you to make adjustments before committing to adhesive or grout.
- Use spacers for even gaps: When installing tiles, whether on the floor or backsplash, use spacers to ensure even gaps between tiles. This is crucial for maintaining a consistent and professional look. Spacers also help keep tiles in place while the adhesive dries.
- Invest in a quality tile cutter: A quality tile cutter is essential for making precise cuts, especially for challenging areas like corners or around outlets. Manual tile cutters are sufficient for small projects, but if you’re working with harder materials like porcelain or natural stone, consider renting a wet saw for cleaner cuts.
- Start from the center: For both flooring and a backsplash, start your installation from the center of the space and work your way outward. This technique helps ensure that your tiles are evenly distributed and that any cut tiles are placed along the edges where they are less noticeable.
- Work in small sections: Apply adhesive or mortar in small sections to prevent it from drying out before you have a chance to set the tiles. This approach also allows you to focus on getting each section perfectly aligned before moving on to the next.
- Use a tile leveling system: A tile leveling system can help ensure that your tiles are perfectly level with one another, preventing lippage (uneven heights between adjacent tiles). These systems are particularly useful for large format tiles or uneven surfaces.
- Grout and seal: Once your tiles are set, grouting is the final step. Be sure to remove excess grout promptly to avoid it hardening on the surface of the tiles. And after the grout has cured, seal it to protect against moisture and staining — especially in areas prone to spills, such as in the kitchen.
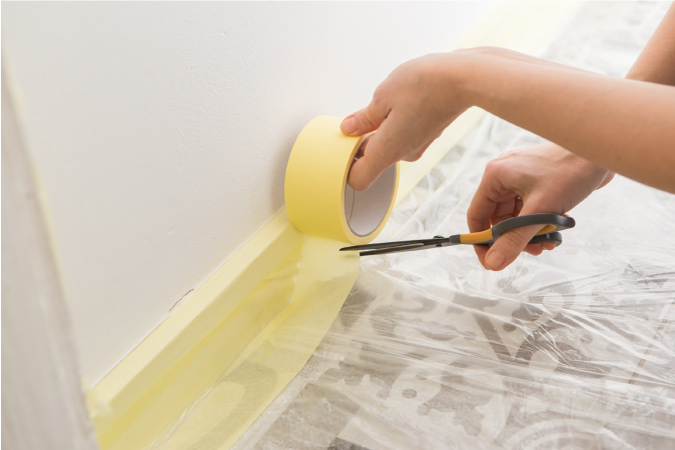
The key to a flawless paint job lies in the prep work, and skipping or rushing through this phase can lead to issues like uneven coverage, drips, and peeling.
9. Paint and Add Finishing Touches.
- DIY difficulty level: Easy
- Estimated DIY cost: $300-$750
- Estimated contractor cost: $1,000-$3,000
- Estimated time: 3-5 days
The final phase of your kitchen remodel involves painting and adding those all-important finishing touches. These steps bring the entire design together, adding color, texture, and personality to your space. However, while painting might seem like one of the simpler tasks in your remodel, achieving a professional finish requires careful preparation, the right tools, and some insider tips.
Painting can be deceptively tricky. The key to a flawless paint job lies in the prep work, and skipping or rushing through this phase can lead to issues like uneven coverage, drips, and peeling. Additionally, kitchens present unique challenges due to the presence of grease, moisture, and varied surfaces such as cabinets, trim, and walls. Ensuring that paint adheres well and looks good across all these different surfaces takes some planning and technique.
Finishing touches, such as installing cabinet hardware, can also be more challenging than they first appear. These elements require precision, and even small mistakes can detract from the overall appearance of your kitchen.
Tips and Tricks for a Smoother Installation
- Thoroughly prep your surfaces: Before you even think about dipping a brush into paint, make sure all surfaces are clean, dry, and properly primed. Kitchens often have a buildup of grease and grime, especially on cabinets and walls near the stove. Use a degreaser or a solution of TSP (trisodium phosphate) to clean these areas thoroughly. Sanding glossy surfaces lightly will also help the primer and paint adhere better.
- Choose the right paint: Not all paints are created equal, especially for kitchen environments. Opt for a high-quality paint that is durable, washable, and resistant to moisture and stains. Satin or semi-gloss finishes work best for kitchens because they are easy to clean and can withstand the room's wear and tear.
- Use painter’s tape wisely: Achieving clean, sharp lines is crucial for a polished look. Use painter’s tape to mask off edges, trim, and areas where different colors meet. Press the tape down firmly to prevent paint from seeping underneath, and remove it while the paint is still slightly wet to avoid peeling.
- Apply paint in thin, even coats: For the best results, apply multiple thin coats of paint rather than one thick coat. This approach helps prevent drips, allows for even coverage, and gives the paint a smoother finish. Start by cutting in with a brush around the edges, and then use a roller to fill in larger areas. Be patient and let each coat dry completely before applying the next.
- Don’t forget the ceilings and trim: Ceilings and trim are often overlooked, but they play a crucial role in the overall look of your kitchen. If your ceiling needs freshening up, paint it before the walls to avoid splatters on your new paint job. For trim, consider using a gloss or semi-gloss finish for a crisp, clean look.
- Install hardware and fixtures carefully: Once the paint is dry, it’s time to add the finishing touches such as cabinet hardware and outlet covers. Use a template or guide when drilling holes for cabinet pulls and knobs to ensure consistent placement.
- Touch up and inspect: After all the major painting and installations are complete, go over your work to touch up any imperfections. Keep a small brush handy for minor fixes and ensure everything is aligned and secure. Take your time with this final step, as it can make a big difference in the overall quality of your remodel.
DIY Kitchen Remodel — FAQs
Q: Can I remodel my kitchen by myself?A: Yes, you can! With the right planning, tools, and determination, a DIY kitchen remodel is entirely doable. Be realistic about your skills, though, and know when to call in a professional — especially for electrical and plumbing work.
A: Absolutely. With careful budgeting and smart choices, you can achieve a beautiful and functional kitchen remodel for $10,000 or even less. Focus on high-impact, cost-effective changes like painting cabinets and updating hardware.
A: Here’s the order that we recommend for tackling your kitchen remodel:
- Set a budget.
- Gather inspiration.
- Plan your layout.
- Set up a makeshift kitchen.
- Get down and dirty with demolition.
- Assess the electrical and plumbing work involved.
- Install cabinets and countertops.
- Replace the flooring and backsplash.
- Paint and add finishing touche
Q: What is a realistic budget for a kitchen remodel?
A: A realistic budget for a DIY kitchen remodel ranges from $10K-$15K. This allows for essential updates without extravagant spending. If hiring a contractor, expect to spend $20K-$50K, depending on the project's scope.
Save Time and Stress With PODS
During your remodel, consider using a PODS portable storage container to keep your appliances, materials, and tools close by but out of the way. This will help keep your home organized and make the renovation process go smoother. Plus, if you decide to hire a contractor, they’ll appreciate the extra space to work!
For more tips and inspiration, check out the PODS Blog, where you can find articles on kitchen remodeling and more!
This content was created with the assistance of artificial intelligence. It was then fact-checked, proofread, and edited by the real-life intelligence of the PODS Blog team.

Your quote in 60 seconds
Get pricing tailored to your needs!

